Getting started w/ React & Mocha
Coding
11/23/2015: I updated this blog post as well as the code to support the newest version of React, ReactDOM, ReactTestUtils, Mocha, JSDOM, Babel. The changed are really minor, but may be frustraiting for some. For those, who are interested in how should this code be written using older version of these libs (React 0.13.3, Mocha 2.0.1, JSDOM 3.1.2, Mocha-JSDOM 1.0.0, Babel 5.1.13) please clone this commit from GitHub.
It took me half day to setup [almost] empty environment for React app development with testing done using Mocha.
I decided to share my findings here so it would remain.
My target
I wanted to create an environment for further React development. The things that I needed to have:
- source structure, that would be suitable for medium-sized project
- build scripts, that would do all needed transformations, run tests, show the output of my app
- Mocha as a test framework of choice
For build scripts I prefer to use gulp.
tl;dr
You can find working code here. Just download it and run
$npm install
followed by
$npm test
If you are using Visual Studio Code - you can build it using ⇧⌘B (on Mac).
How I did it
I started with these three stages:
- Prepare the environment
- Create first React component
- Add Mocha tests
Step 1. Prepare the environment
First install Node.js (if you don’t have it yet). In your project directory (react-mocha-example in my case) through Terminal do:
$npm init
and follow the instruction. Then run this command to install libraries to setup the working environment:
$npm install react react-dom babel babel-preset-es2015 babel-preset-react gulp gulp-load-plugins browserify babelify babel-core vinyl-source-stream gulp-open --save-dev
Now your package.json should look like this:
Add .babelrc file to your project root with these settings:
Create gulpfile.js to configure build steps: I’m using gulp-load-plugins for easy and fast use of different gulp plugins. It enables me to access all the plugins I have listed in package.json file without ‘require’ each of them separately.
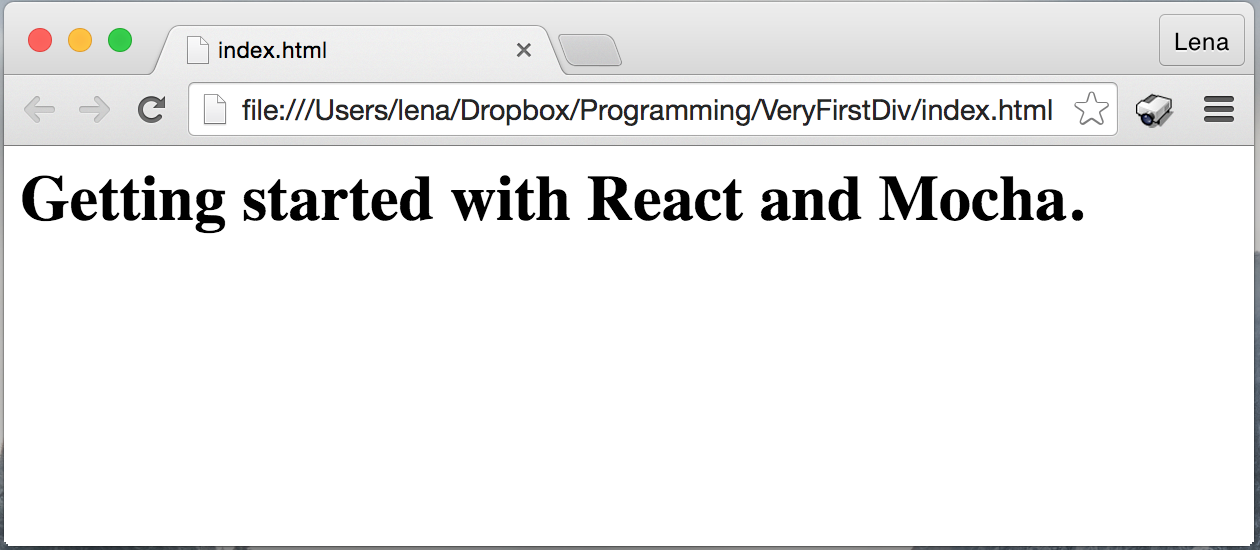
So now everything is ready to start really writing a code. Create index.html file:
Run build command: either using ⇧⌘B (from Visual Studio Code on Mac) or command line:
$gulp build
And you should get Chrome opened with very first version of our app.
Step 2. Create first React component
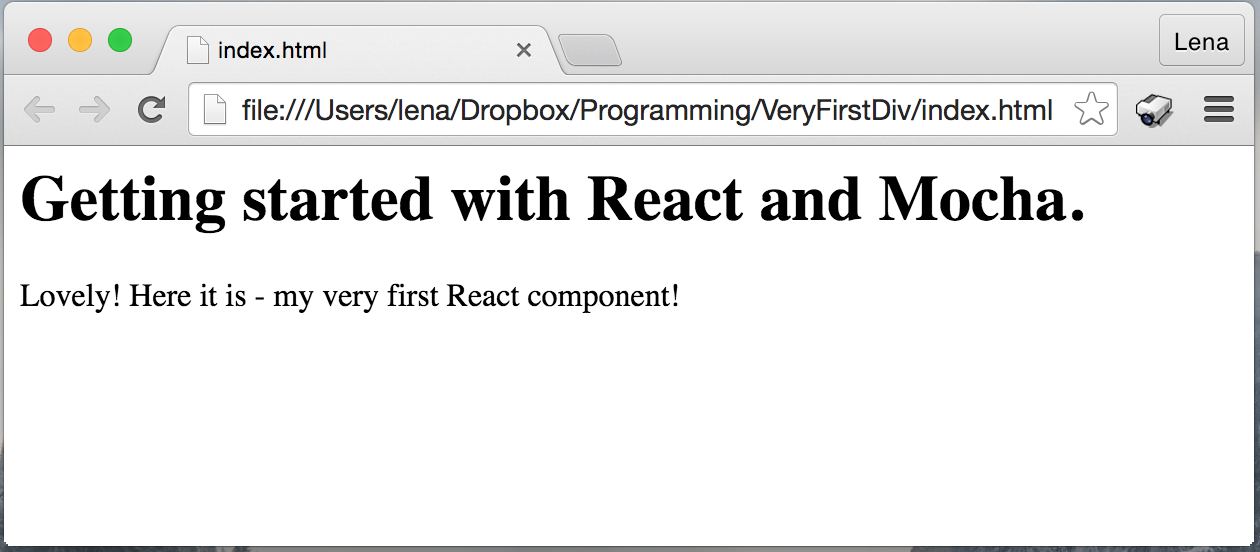
Create a components directory and component.jsx file in it:
Add this componenet to DOM (I did it in app.jsx file in my project root directroy react-mocha-example)
Run build task and we can see our React component in a browser.
Step 3. Adding first Mocha test
This was the trickiest step for me. I found a couple of good articles on the topic. These are my favourite:
- Isomorphic Server & Browser Side Rendering with React (in 3 parts)
- Testing React Web Apps with Mocha (in 2 parts)
- Testing React Components
Ok, let’s begin. First, we need to install Mocha. To do it, run npm install command with –save-dev, this way your package.json file will be kept updated with all the dependances you use:
$npm install mocha --save-dev
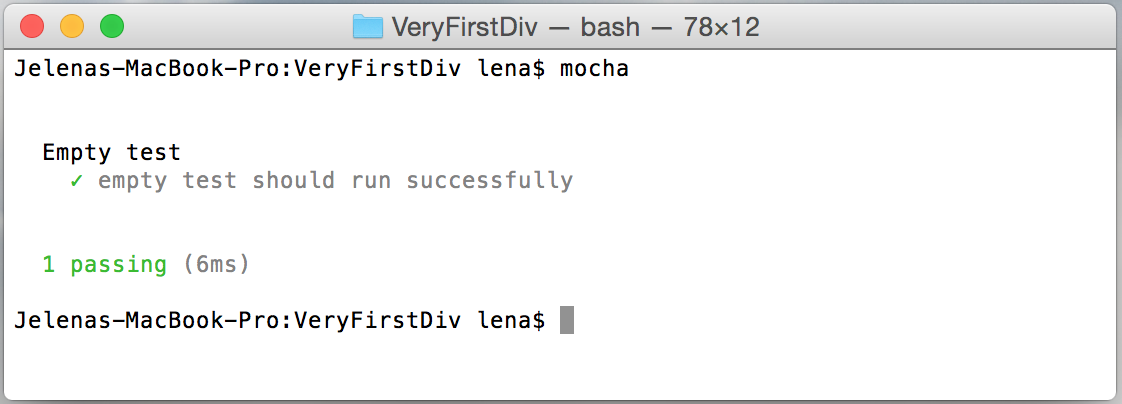
Create test directory and a first empty-test.js, which just asserts true all the time.
You can try whether it works just running Mocha from command line from you project root folder:
$mocha
You should get this output:
Now let’s add test running step in our gulp configuration. For this I used gulp-mocha - a gulp plugin wrapper around Mocha.
Now add a new ‘test’ step in gulpfile.js to run mocha:
Before moving on to testing our React component, we need to take care of a couple of things.
First - DOM mocking. You can find very good explanation about how to mock DOM in this blog post. To follow this example we need to install jsdom and mocha-jsdom. I’ve created dom-mock.js file (it’s a bit different from what is given in the article, I adopted it to be compatible with the newest JSDOM version).
Second - install React TestUtils add-on:
$npm install react-addons-test-utils --save-dev
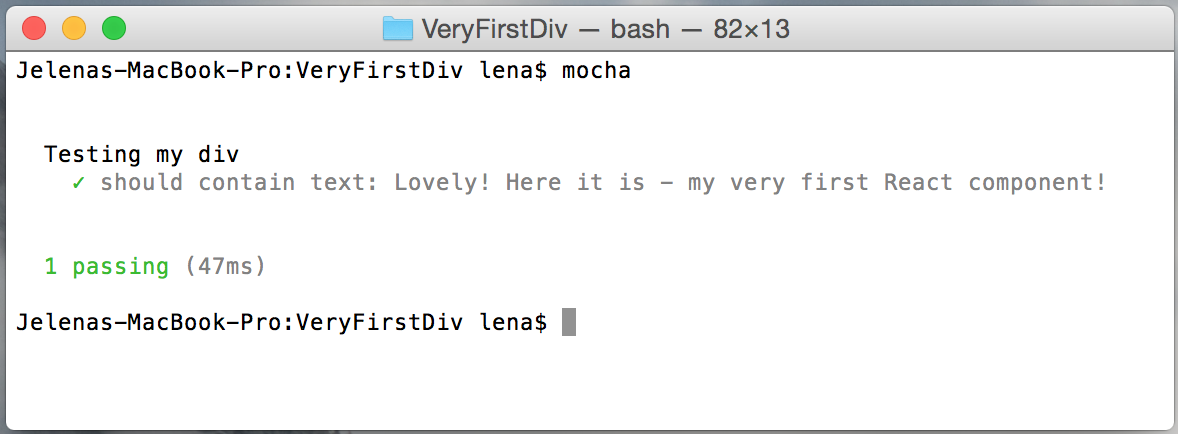
And finally - the test! I’ve created component-test.js file in test directory:
Run build. Hurray! The test is passing:
You can also configure your package.json - to run tests from command line using npm. For this add test section in your package.json like this:
Now you can run:
$npm test
That’s it! You can download the latest code for this example from GitHub.
Happy Testing!